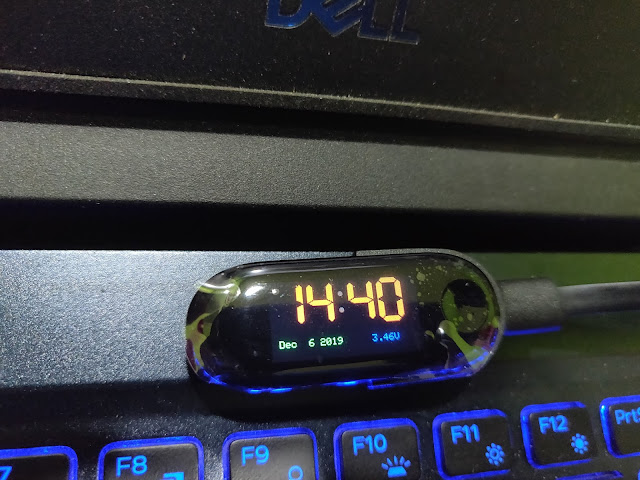
Hello there. Just recently I received my first LilyGO T-WristBand that I purchased from AliExpress. This wristband is programmable, as the name state, and using ESP32-PICO-D4 as their main chip.
Now I will guide on how to program this wristband, and change the boot screen (please correct me if there is any suitable term for this). I assume you already installed Arduino, and have the basic knowledge for this.
1. Go to this link, and clone the repo. https://github.com/Xinyuan-LilyGO/LilyGO-T-Wristband
2. To make sure there is no error in dependency, I suggest you move all libraries to another directory. Just make the default directory empty. The default Arduino Libraries is located in Documents\Arduino\libraries. Empty this directory to another directory.
3. Now time to install the required dependencies. Download these two libraries.
https://github.com/Bodmer/TFT_eSPI/archive/master.zip
https://github.com/lewisxhe/PCF8563_Library/archive/master.zip
4. Now import the library as follows. Open your Arduino, click on Sketch tab > Include Library > Add .ZIP Library...
5. Import both library from step 3.
6. Now edit your User_Setup_Select.h inside Documents\Arduino\libraries\TFT_eSPI-master. Look for #include <User_Setup.h>, then comment out it. Next, look for #include <User_Setups/Setup26_TTGO_T_Wristband.h>, then uncomment it. Now save it.
7. Now go to LilyGO-T-Wristband directory. Open LilyGO-T-Wristband Arduino file.
8. The default image on boot screen is inside ttgo.h. You need to remove it and create a new file. To generate this kind of file, you need to have a really small photo, that size about 160 x 97 pixels. I assume you already have the photo with this size.
9. Now go to this link to generate the file for our boot screen. http://www.rinkydinkelectronics.com/t_imageconverter565.php. Convert it to .c file, and download it.
10. Now you already download the .c file. Edit the file as we need to remove the unused part. From this.
Becoming this.
What happened in step number 10? I do remove the if else condition, PROGMEM, and make the name only one word. Now save it, and move this file into the LilyGO-T-Wristband directory. Rename this file becoming .h filetype and one word. For example, ryuko.h.
11. Now edit LilyGO-T-Wristband Arduino file, and if you search for ttgo inside it, you will find 2 of it. Change it to ryuko.
12. Now time to verify the code and upload it.
Below is mine
If you have any questions regarding this, feel free to ask.
Source:
- https://github.com/Xinyuan-LilyGO/LilyGO-T-Wristband
- http://www.rinkydinkelectronics.com/t_imageconverter565.php


Hi Mate, nice to meet you. Im Javier and I'm from Spain. I have bougth the LILYGO TTGO T-Wristband DIY Programmable Smart Bracelet and the Arduino MRK1000, I have to do a proyect for the University and I have some doubts about it. I want to ask you if you would help me with that. My personal mail is javieralonso@opendeusto.es Thank you!!
ReplyDeleteIn the Arduino/Sketch screen shot I was hoping to find what board you selected. When adding the needed Library I show several items listed. What board did you select?
ReplyDelete1xbet korean - Bet Now » Free Bets & Sign Up Offers »
ReplyDelete⭐ 1xbet korean. 1xbet korean. 1xbet korean. 1xbet korean. 1xbet korean. 1xbet korean. 1xbet happyluke korean. 카지노 1xbet korean. 1xbet korean. 1xbet 1xbet